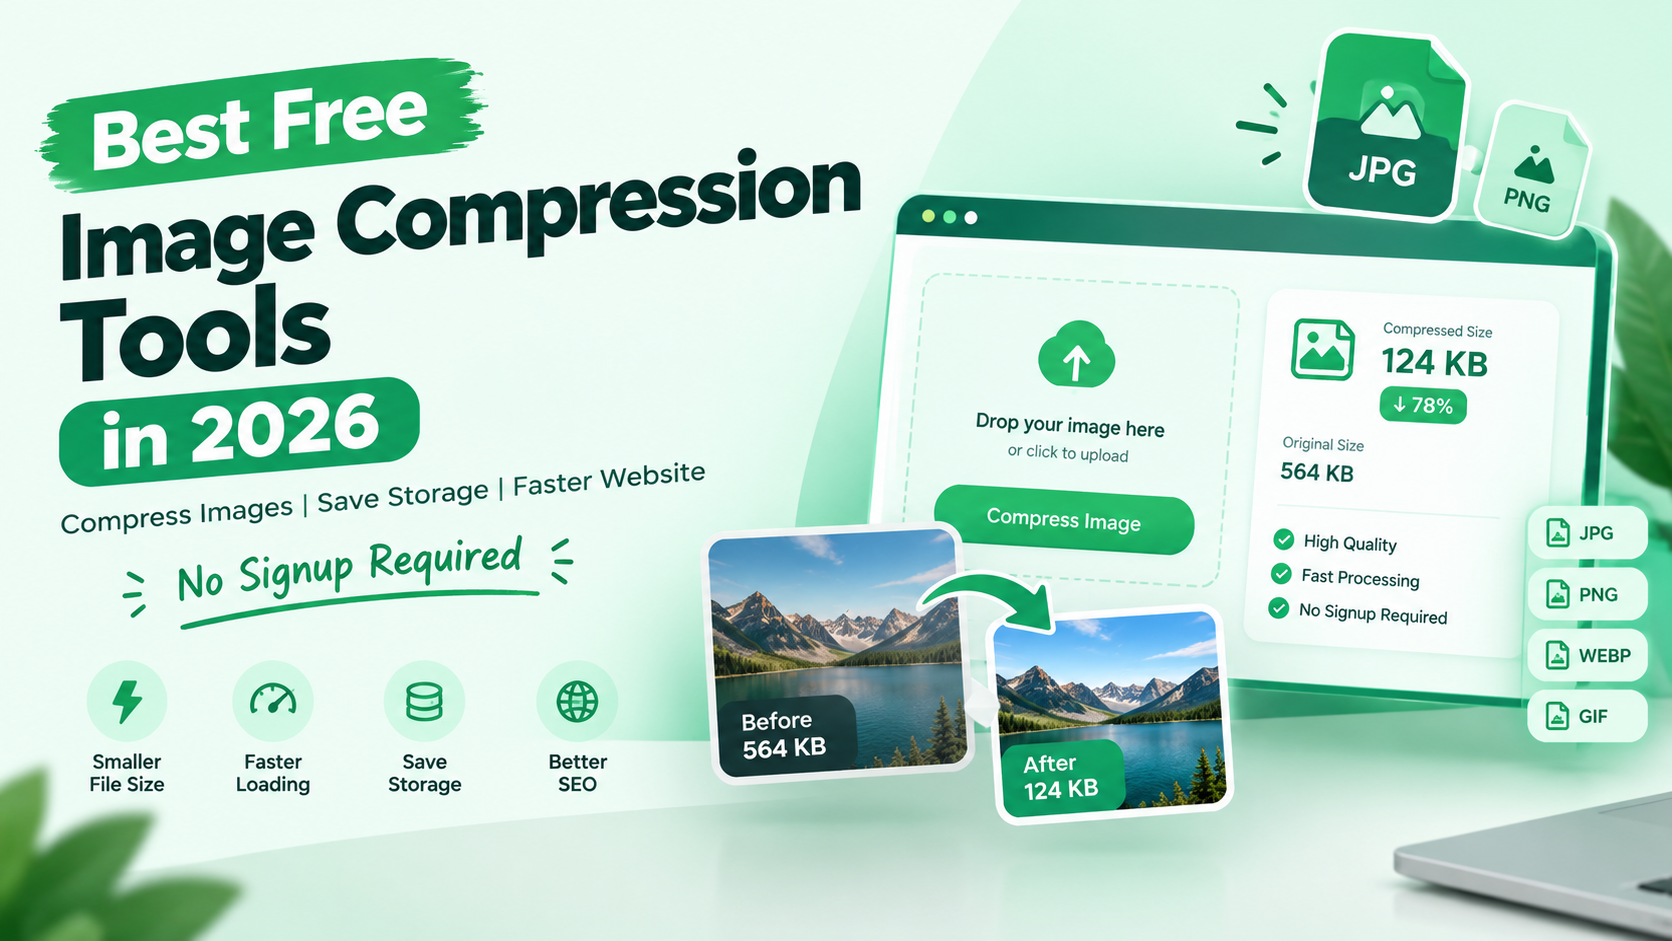
Navigating the digital landscape in India often requires specific file sizes for government portals, exam applications, and passport uploads. Finding reliable Free Image Compression Tools that respect your privacy without demanding a lengthy registration process can be a challenge.

This guide highlights the most efficient utilities available today. We feature ImageTo20KB as the premier choice for meeting strict 20KB requirements for official documentation. For broader needs, we also evaluate TinyPNG, Squoosh, Cloudinary, ImageOptim, and Compressor.io.
Each platform offers unique benefits, ranging from high-fidelity optimization to rapid batch processing. We will compare these options based on output quality, privacy standards, and overall ease of use to ensure your uploads succeed every time.
Key Takeaways
- ImageTo20KB is the go-to solution for precise 20KB file requirements for Indian exam forms.
- Top-tier utilities like TinyPNG and Squoosh provide excellent quality for general web use.
- Privacy remains a priority, as all listed options function without mandatory account signups.
- Batch processing capabilities help save time when handling multiple files simultaneously.
- We evaluate each service based on upload success rates and format compatibility.
How to Choose the Right Free Image Compression Tool
Whether you are applying for a government exam or optimizing a website, your choice of tool matters. Selecting the right free image compressor depends on your specific goals, such as meeting a strict file-size limit or simply speeding up a webpage. Understanding the differences between these services will save you time and frustration.
Match the tool to file-size limits, image dimensions, and output format
If you are preparing documents for an Indian exam portal, you often face a rigid 20KB limit. In these cases, ImageTo20KB is your best ally because it is specifically designed to hit those exact targets without guesswork. General-purpose tools might not offer the same level of precision for such small, specific file requirements.
For broader needs, such as resizing large photos or changing formats, you should look for tools that handle dimensions effectively. Always check if the platform supports the format you need, whether it is a standard JPEG for a photo or a PNG for a signature with a transparent background.
Compare quality retention, batch processing, privacy, and ease of use
When you prioritize visual quality, online image compression services like TinyPNG and Compressor.io offer excellent balance for general web use. If you are a power user who values privacy, Squoosh is a fantastic choice because it processes your images locally in your browser. For Mac users, ImageOptim remains a top-tier option for batch processing files without uploading them to a remote server.
Ease of use is another factor to consider. Some tools provide a simple drag-and-drop interface, while others offer advanced sliders to adjust quality levels manually. Choose a tool that matches your technical comfort level and the volume of images you need to process.
Separate truly no-signup tools from free tools with account-based features
It is important to distinguish between anonymous, one-off tools and platforms that require an account. Most free image compressor options allow you to upload files instantly without any registration. This is perfect for quick tasks where you want to avoid sharing your email address.
However, services like Cloudinary operate differently. While they offer powerful features, their free tier is often built for managed media workflows and developers rather than anonymous, one-time uploads. Always verify if a service requires a login before you start your online image compression task to ensure it fits your workflow.
How Image Compression Affects Quality, Size, and Upload Success
Every time you compress a photo, you are making a trade-off between visual detail and storage space. Understanding this process helps you avoid common pitfalls when preparing documents for government portals or online applications. Effective image file size reduction is not just about making a file smaller; it is about keeping the image clear enough for its intended purpose.
Lossy and lossless compression explained for everyday users
When you use lossy compression, the tool permanently removes some of the original pixel data to shrink the file. This method is highly effective for photographs where the human eye might not notice minor changes in color or texture. It is the go-to choice when you need to meet strict size limits for exam forms.
In contrast, lossless compression preserves the original pixel data as closely as possible. While this keeps your image looking perfect, it often results in larger file sizes. Most users prefer a balance, using lossy methods for general web uploads and lossless methods when every single detail must remain perfectly sharp.
Why resizing can reduce file size more effectively than compression alone
Many people try to shrink a massive 10MB photo by simply lowering the quality settings. However, this often leads to a blurry, unusable image. A much better strategy is to resize the image dimensions first, such as changing a high-resolution camera shot to a standard 800×600 pixel size.
By reducing the physical dimensions, you naturally lower the total number of pixels the file needs to store. This approach is often more effective than aggressive compression alone. If you are struggling to hit a specific target, tools like ImageTo20KB are incredibly useful because they combine resizing and compression to meet exact requirements without sacrificing too much clarity.
When JPEG, PNG, WebP, and AVIF are the better choice
Choosing the right format is just as important as the compression method you select. Here is a quick guide to help you decide:
- JPEG: The standard for photographs. It handles colors well and is widely accepted by almost every online portal.
- PNG: Best for logos, signatures, and graphics that require transparency or sharp, crisp edges.
- WebP and AVIF: These modern formats offer superior compression, making them ideal for websites that need to load quickly.
While WebP and AVIF are great for web developers, official government forms often stick to traditional JPEG or PNG requirements. Always check the specific instructions for your application to ensure your chosen format is supported. Using the right tool ensures your document is accepted on the first try.
Free Image Compression Tools: Quick Comparison for 2026
Finding the right tool to compress images online can feel overwhelming given the sheer number of options available in 2026. While many platforms promise high-quality results, the best choice often depends on your specific technical needs and the type of file you are handling.
Performing a thorough image compression comparison helps you avoid wasting time on tools that do not meet your requirements. Whether you need to shrink a massive photo for a website or hit a precise 20KB limit for an official application, selecting the right utility is vital.
Comparison criteria: signup requirements, supported formats, exact-size control, and platforms
When evaluating these tools, we look at four main factors: whether they require a signup, which file formats they support, if they offer exact-size control, and which platforms they serve. Most online tools are browser-based, but some offer unique advantages for specific workflows.
| Tool | Best For | Platform | Exact Size Control |
|---|---|---|---|
| ImageTo20KB | Official Forms | Web | Yes |
| TinyPNG | General Use | Web | No |
| Squoosh | Privacy/Custom | Web | Yes |
| Cloudinary | Developers | Web/API | Yes |
| ImageOptim | Mac Users | macOS | No |
| Compressor.io | Quick Tasks | Web | No |
Which tools work best for photos, transparent graphics, websites, and official forms
If you are preparing documents for government portals or exam boards, ImageTo20KB is the most relevant choice because it specializes in meeting strict file-size limits. For general tasks, TinyPNG and Compressor.io offer excellent, user-friendly ways to compress images online without any complex settings.
For those who prioritize privacy, Squoosh allows you to process files locally in your browser, while ImageOptim provides a powerful, private workflow for macOS users. Finally, Cloudinary stands out as a robust platform for developers who need to automate image delivery across large websites.
ImageTo20KB for Exact File-Size Targeting
Navigating the strict requirements of online application portals can be a stressful experience for many students and professionals in India. When you need to resize image to 20KB or compress image to 20KB for a government form, standard tools often fall short by failing to hit that precise target. Specialized platforms bridge this gap by offering dedicated solutions for these specific constraints.
ImageTo20KB
Overview of ImageTo20KB’s exact 20KB use case
The primary goal of ImageTo20KB is to help users meet rigid upload limits without needing technical expertise. It focuses on providing a streamlined path to achieve a specific file size, which is essential for official documentation.
Pros of targeting a precise file size without creating an account
You can resize image to 20KB instantly without the hassle of signing up or managing a profile. This privacy-friendly approach ensures your documents remain secure while you get the job done quickly.
Cons and limitations when balancing 20KB against image quality
Forcing a file to be extremely small can sometimes lead to a loss of sharpness or detail. Users should be aware that aggressive compression might affect the readability of fine text or signatures.
Features: resize an image to 20KB and compress an image to 20KB
The platform offers dedicated tools at resize image to 20KB and compress image to 20KB. These features are designed to handle the heavy lifting of pixel adjustment and data reduction automatically.
Useful pages: resize image to 20KB and compress image to 20KB
These specific pages provide a guided experience for users who need to prepare files for various portals. By following the on-screen prompts, you can ensure your files meet the exact technical specifications required.
Best for Indian exam forms, passport photos, signatures, and strict upload limits
This tool is highly recommended for anyone applying to Indian universities or government services. It simplifies the process of preparing passport photos and signatures that must adhere to strict size guidelines.
How to check dimensions, file type, and final size before submitting a form
Always verify your file by right-clicking the properties on your computer or checking the file details after download. Ensure the dimensions match the portal’s requirements and that the image remains clear enough for verification.
TinyPNG
Overview of TinyPNG’s browser-based photo and PNG compression
TinyPNG is a popular choice for general-purpose image reduction. It uses smart lossy compression to decrease file sizes while maintaining a high level of visual quality.
Pros: simple workflow, dependable results, and support for common image formats
The drag-and-drop interface makes it incredibly easy to use for beginners. It consistently delivers reliable results for standard web images and social media graphics.
Cons: free upload limits, less control over an exact final file size, and possible quality trade-offs
While effective, it does not allow you to set a specific target size like 20KB. You may find that the output is either too large or too small for strict application forms.
Features: drag-and-drop compression, batch uploads, and downloadable optimized files
Users can upload multiple images at once, which saves time when managing large folders. The optimized files are then ready for quick download.
Best for quick website images, social graphics, and everyday photo reduction
It is an excellent tool for web developers and content creators who need to optimize images for faster loading times. However, it is less suited for rigid, form-based requirements.
Squoosh
Overview of Squoosh’s in-browser, locally processed image optimization
Squoosh is a powerful tool developed by Google that runs entirely in your browser. Because it processes images locally, your data never leaves your device, ensuring maximum privacy.
Pros: strong privacy, detailed quality controls, format conversion, and no account requirement
You get granular control over every aspect of the compression process. It supports a wide range of formats, including WebP and AVIF, without requiring any account setup.
Cons: more settings to understand and less convenient for large batch jobs
The interface can be overwhelming for users who just want a quick fix. It is designed for individual image processing rather than handling large batches efficiently.
Features: adjustable codecs, side-by-side previews, resizing, metadata control, and quality sliders
The side-by-side preview is a standout feature that lets you see the impact of your changes in real-time. You can adjust quality sliders to find the perfect balance between size and clarity.
Best for users who want precise visual control over WebP, AVIF, JPEG, or PNG output
This is the go-to tool for designers and power users who need to fine-tune their images. It provides the most control over the final visual output.
Cloudinary
Overview of Cloudinary’s media optimization and delivery platform
Cloudinary is a comprehensive solution for managing media assets at scale. It is widely used by professional teams to automate image delivery across websites and mobile apps.
Pros: powerful automatic transformations, responsive image delivery, CDN support, and developer controls
It offers advanced features like automatic format selection and responsive resizing. These tools ensure that images look great on any device while maintaining optimal performance.
Cons: the free tier generally requires an account, setup is more complex, and it is not ideal for one-off anonymous compression
The complexity of the platform makes it overkill for simple tasks. Most users will find the account requirements and setup process too time-consuming for a single image upload.
Features: URL-based transformations, automatic format selection, quality optimization, resizing, and image delivery analytics
The platform excels at dynamic image manipulation through simple URL parameters. It provides deep insights into how your media is performing across your digital channels.
Best for websites, apps, and teams managing large media libraries rather than simple form uploads
It is a professional-grade tool meant for developers and businesses. It is not recommended for users who simply need to meet a quick 20KB upload limit for a form.
ImageOptim
Overview of ImageOptim’s free macOS desktop compression workflow
ImageOptim is a desktop application for macOS that strips away unnecessary metadata and optimizes images. It is a favorite among Mac users who prefer local software over online services.
Pros: no signup, local processing, metadata removal, and effective lossless optimization
It is completely free and respects your privacy by keeping all processing on your machine. The removal of metadata helps reduce file size without sacrificing image quality.
Cons: macOS-only availability, limited browser access, and less convenient exact-size targeting
The lack of a web version limits its accessibility for Windows or Linux users. It also lacks the specific “target size” features found in specialized form-filling tools.
Features: drag-and-drop batch processing, metadata stripping, and optimization through established compression tools
The interface is clean and supports simple drag-and-drop functionality. It integrates several high-quality compression algorithms to ensure the best possible results.
Best for Mac users optimizing website assets, documents, and image folders privately
This tool is perfect for Mac users who want a reliable, private way to manage their image assets. It is highly efficient for cleaning up folders of images before uploading them to a website.
Compressor.io
Overview of Compressor.io’s online lossless and lossy compression modes
Compressor.io provides a straightforward online interface for reducing image sizes. It offers both lossy and lossless modes, giving users a choice based on their quality needs.
Pros: easy interface, no account needed for basic use, and support for common photo and graphic formats
The service is fast and requires no registration for basic tasks. It supports popular formats like JPEG and PNG, making it a versatile option for quick edits.
Cons: limited advanced controls, possible upload-size restrictions, and no guaranteed exact 20KB output
It lacks the precision required for strict form limits. You might find it difficult to hit a specific file size, as the tool focuses on general optimization rather than exact targets.
Features: lossy or lossless selection, browser uploads, and downloadable compressed files
The process is simple: upload, choose your mode, and download the result. It is a no-nonsense tool for those who need quick results without complex settings.
Best for fast one-off reductions when the required file size is flexible
This tool is ideal for casual users who need to shrink an image for email or general sharing. It is a great backup option when you don’t have strict size constraints.
| Tool Name | Best For | Exact Size Control | Privacy Level |
|---|---|---|---|
| ImageTo20KB | Exam Forms | High | High |
| TinyPNG | Web Graphics | Low | Medium |
| Squoosh | Custom Editing | Medium | Very High |
| Cloudinary | Enterprise Media | High | Medium |
| ImageOptim | Mac Users | Low | Very High |
| Compressor.io | Quick Reductions | Low | Medium |
Which Free Compression Tool Is Best for Each Common Need?
Selecting the perfect image compression tool is easier when you know exactly what each platform does best. Rather than searching for a single universal solution, it is smarter to pick a tool tailored to your specific task. Whether you are dealing with strict document requirements or general web optimization, there is a specialized option ready to help.
Best for exact 20KB exam forms, passport photos, and signatures: ImageTo20KB
When you are applying for government portals or university exams in India, you often face rigid file size limits. ImageTo20KB is the premier choice for exact 20KB image compression. It allows you to hit precise targets without the guesswork, ensuring your documents are accepted on the first try.
Best for the simplest general-purpose online compression: TinyPNG
If you need to reduce file sizes quickly without adjusting complex settings, TinyPNG is the industry standard. It uses smart lossy compression to shrink images while keeping them looking sharp. It is perfect for everyday users who want a simple drag-and-drop experience.
Best for private, customizable browser-based optimization: Squoosh
For those who prioritize privacy, Squoosh is an incredible tool developed by Google. Because it processes images locally in your browser, your files never leave your computer. It offers granular control, letting you compare quality levels side-by-side before you save.
Best for website delivery automation and development workflows: Cloudinary
Cloudinary stands out for developers and website owners who need to automate media management. It handles complex tasks like format conversion and responsive resizing automatically. It is the most robust solution for scaling professional web projects.
Best for private batch compression on a Mac: ImageOptim
If you are a Mac user, ImageOptim is a must-have utility for cleaning up images. It removes unnecessary metadata and optimizes files in bulk without sacrificing quality. It is highly efficient for managing large folders of photos locally.
Best for quick lossy or lossless online compression: Compressor.io
Compressor.io provides a flexible interface for those who need high-quality results fast. It supports both lossy and lossless modes, giving you the freedom to choose the best balance for your specific project. It is a reliable, no-nonsense tool for quick reductions.
“Efficiency is doing things right; effectiveness is doing the right things.”
— Peter Drucker
| Tool Name | Primary Strength | Best For |
|---|---|---|
| ImageTo20KB | Exact 20KB image compression | Exam forms & signatures |
| TinyPNG | Ease of use | General web images |
| Squoosh | Privacy & control | Sensitive documents |
| Cloudinary | Automation | Web development |
| ImageOptim | Batch processing | Mac users |
How to Compress an Image Without Losing More Quality Than Necessary
Getting your images ready for upload doesn’t have to mean sacrificing every detail of the original photo. True image compression without losing quality is often a myth, as most methods involve some data removal. Instead, think of it as finding the smallest acceptable reduction that keeps your file looking professional and clear.

Start by keeping an original copy of the image
Always maintain a high-resolution master file on your device before you begin any editing. If a compression attempt goes wrong or the file becomes too blurry, you can simply start over with the original. Never overwrite your only copy during the optimization process.
Resize oversized photos before adjusting compression quality
Many users make the mistake of trying to compress a massive, high-resolution photo directly. By resizing the dimensions to match the actual requirements of your form first, you naturally reduce the file size. This step often makes image compression without losing quality much easier to achieve because the tool has less data to process.
Choose the correct format for photographs, logos, screenshots, and signatures
Selecting the right file type is vital for maintaining visual integrity. Use JPEG for complex photographs, while PNG is better for sharp text, logos, and signatures. Choosing the wrong format can lead to unnecessary blurriness or larger file sizes than needed.
Use visual previews to compare readability, sharpness, and artifacts
Tools like Squoosh offer excellent visual controls that let you see changes in real-time. In contrast, TinyPNG and Compressor.io provide simpler, automated workflows that are perfect for quick tasks. Always inspect your image for artifacts—those tiny, blocky distortions—before you finalize your download.
Verify the final file size after downloading the compressed image
When you have a strict requirement, such as an exact 20KB limit, you may need to make tough trade-offs. ImageTo20KB is specifically designed to hit these precise targets, though you might notice a slight drop in clarity. Always double-check the final file size to ensure it meets the portal’s criteria while remaining legible enough for official use.
How to Prepare an Image for a Strict 20KB Upload Limit
Meeting a precise 20KB upload limit is often the final hurdle before you can successfully submit your digital documents. Whether you are applying for a competitive exam or a government service, these strict constraints ensure that portals remain fast and efficient for everyone.
Read the application’s requirements for dimensions, file type, and maximum size
Before you start editing, always review the official guidelines provided by the portal. Most applications specify not just a maximum file size, but also required pixel dimensions and preferred file formats like JPEG or PNG.
Ignoring these details often leads to rejected uploads. Take a moment to note down the exact width, height, and file extension requested by the authority.
Use ImageTo20KB’s resize or compression workflow for a precise target
Instead of using generic tools that might not hit your target, rely on specialized solutions. ImageTo20KB offers dedicated workflows designed specifically to help you meet a 20KB upload limit without guesswork.
You can choose between their resize-to-20KB or compress-to-20KB options depending on whether your file is too large in dimensions or just too heavy in data. This targeted approach saves you time and frustration during the application process.
Keep faces, signatures, and small text clear at the required dimensions
It is crucial to maintain the legibility of your documents. When shrinking an image to meet a size constraint, check that your face in a passport photo remains sharp and that your signature is not blurred.
If the text or details become unreadable, try adjusting the dimensions slightly before applying further compression. Quality retention is just as important as meeting the file size requirement.
Rename the final file and confirm that it opens before uploading
Once you have successfully compressed your image, give it a clear, simple name that follows the portal’s naming conventions. Avoid using special characters or spaces if the system is sensitive to them.
Finally, open the file on your device to ensure it looks correct. Confirming that the file is under the 20KB upload limit and opens perfectly will give you the confidence you need to hit the submit button.
Privacy and Security When Using Online Image Compressors
Secure image compression is more than just shrinking file sizes; it is about knowing where your data goes. When you use an online tool, your file is often sent to a remote server for processing. Understanding this journey is the first step toward keeping your digital information safe.

Understand whether images are processed locally or uploaded to a server
Most web-based tools require you to upload your image to their servers to perform the compression. Once the process finishes, you download the optimized version back to your device. While this is convenient, it means your file exists on a third-party server for a short time.
Some modern tools use browser-based technology to handle files directly on your computer. This local processing ensures that your images never leave your device, providing a higher level of privacy for your personal data.
Prefer Squoosh or ImageOptim for sensitive documents and private photos
If you are handling sensitive documents like bank statements or private photos, tools like Squoosh and ImageOptim are excellent choices. Squoosh runs entirely within your web browser, meaning your data stays on your machine throughout the entire task.
ImageOptim is a powerful utility for Mac users that also prioritizes local processing. By choosing these options, you avoid the risks associated with uploading private files to unknown cloud servers. Always prioritize these tools when confidentiality is your main concern.
Review Cloudinary’s account, storage, and delivery settings before using it for business media
Platforms like Cloudinary are designed for professional workflows and business media management. Because these services often involve account-based storage, you should carefully review their privacy settings before uploading any assets.
Ensure that your account permissions are set correctly to control who can access your media. While these platforms offer robust features for developers, they require a more hands-on approach to data management compared to simple, one-off compression tools.
Remove unnecessary metadata while preserving information required by an official form
Many images contain hidden metadata, such as GPS coordinates or device information, which can be a privacy risk. Removing this data is a great way to practice secure image compression before sharing files online.
However, be cautious when preparing files for official government forms or exam portals. Some applications may require specific metadata or file structures to verify the authenticity of a document. Always check the requirements of the portal to ensure that stripping metadata does not make your file invalid for submission.
Best Image Settings for Indian Exam Forms and Government Applications
When applying for competitive exams in India, your digital assets must meet strict technical standards. Every portal has unique rules regarding file size, dimensions, and background colors. Always prioritize the official guidelines provided by the exam board or government agency over any default settings found in online tools.
Check the exact instructions from the exam board, university, or government portal
Before you begin, carefully read the information brochure or the application portal’s help section. These documents specify the exact file format, such as JPEG or PNG, and the maximum allowed file size. Using ImageTo20KB is a practical choice when you need to hit a precise target, but remember that the portal’s specific rules always take priority.
Prepare passport-style photos with the required background and dimensions
A standard passport photo size is often required for identification purposes. Ensure your photo has the correct background color, usually white or off-white, as requested by the authority. Proper lighting and a neutral expression are just as important as the digital compression settings you choose.
Optimize handwritten signatures without blurring thin strokes
Proper signature image compression is vital to ensure your handwriting remains legible after the upload. You should avoid aggressive compression that might blur the fine lines of your signature. Keeping the original high-resolution scan allows you to re-process the file if the first attempt does not meet the portal’s clarity standards.
Keep separate versions for photo, signature, certificate, and document uploads
It is a smart practice to maintain a folder on your computer containing distinct, labeled files for each requirement. By keeping separate versions for your photograph, signature, and educational certificates, you avoid the risk of accidentally uploading the wrong file. This organization saves time and reduces stress during the final submission process.
| Document Type | Typical Size Limit | Recommended Format | Key Consideration |
|---|---|---|---|
| Passport Photo | 20KB – 50KB | JPEG | White background |
| Signature | 10KB – 20KB | JPEG/PNG | High contrast |
| Certificates | 100KB – 500KB | PDF/JPEG | Text readability |
| ID Proof | 200KB – 1MB | Clear details |
Compression Settings for Photos, Logos, Screenshots, and Scanned Documents
Choosing the right file format is the secret to high-quality images that meet strict upload requirements. Whether you are preparing a passport photo or a digital signature, understanding the difference between JPEG vs PNG is vital for achieving the best results.

Use JPEG or WebP for photographs with gradual color changes
Photographs contain complex color gradients that require efficient compression. JPEG remains the industry standard for these images because it balances file size and visual fidelity effectively. If you need even better performance for web display, WebP offers superior compression while maintaining high quality.
Use PNG when transparency, sharp edges, or text clarity matters
When your image includes text, logos, or transparent backgrounds, you should avoid lossy formats. PNG is the preferred choice here because it preserves sharp edges and fine details without creating artifacts. This format ensures that your scanned documents or official signatures remain perfectly legible.
Use Squoosh or Cloudinary when modern WebP or AVIF delivery is appropriate
For website developers and content creators, WebP and AVIF provide the next generation of image delivery. Tools like Squoosh allow you to experiment with these formats locally in your browser for maximum privacy. Meanwhile, Cloudinary automates the delivery process, ensuring your site loads quickly by serving the most efficient format to each visitor.
Use ImageTo20KB when a form specifies a strict maximum size instead of general optimization
Sometimes, you do not need the latest web format; you simply need to meet a rigid file size limit for an application. ImageTo20KB is specifically designed for these scenarios, such as Indian government exam forms. It focuses on hitting an exact target size rather than just general optimization, ensuring your file is accepted without unnecessary quality loss.
| Image Type | Recommended Format | Primary Benefit |
|---|---|---|
| Photographs | JPEG / WebP | Small size, high color depth |
| Logos & Text | PNG | Sharp edges, no artifacts |
| Web Graphics | WebP / AVIF | Fast loading, modern compression |
| Exam Forms | JPEG (Targeted) | Exact file size compliance |
Common Image Compression Mistakes to Avoid
Navigating the world of digital file management requires a keen eye to avoid frequent image compression mistakes. While tools like TinyPNG or Squoosh are incredibly helpful, using them incorrectly can lead to poor results or rejected applications. Understanding these common pitfalls will help you maintain high quality while meeting strict size limits.
Compressing an already small file repeatedly
Many users believe that running a file through a compressor multiple times will save more space. In reality, this often introduces unwanted artifacts and noise into the image. Each time you re-compress, you lose more data, which degrades the overall visual clarity.
Changing the extension without actually converting the image format
Simply renaming a file from .png to .jpg does not change its underlying structure. This is a dangerous habit that often results in corrupted files that will not open in standard viewers. Always use a proper conversion tool to ensure the file format matches the extension.
Ignoring image dimensions while focusing only on kilobytes
Focusing solely on the file size in kilobytes is a common error. If your image dimensions are too large, the file will remain heavy regardless of the compression level. Resizing the image dimensions first is often the most effective way to reach your target size without sacrificing quality.
Submitting a blurry signature or unreadable passport photo to meet a size limit
When applying for government portals or exams, legibility is non-negotiable. Sacrificing the sharpness of a signature or a face just to hit a 20KB limit will likely lead to your application being rejected. It is better to use a tool that allows for precise control over quality settings rather than aggressive, automatic compression.
Deleting the original before confirming that the compressed file works
Never discard your source file until you have verified the final output. Always check that the compressed image opens correctly and meets all specific requirements of the portal. Keeping the original ensures you have a backup if the first attempt fails to meet the necessary standards.
| Mistake | Consequence | Best Practice |
|---|---|---|
| Repeated Compression | Loss of detail | Compress once from original |
| Renaming Extension | File corruption | Use proper conversion tools |
| Ignoring Dimensions | Poor quality | Resize before compressing |
| Deleting Original | Data loss | Keep backup until upload |
A Final Checklist Before Downloading or Uploading a Compressed Image
A quick final check can save you from the frustration of a rejected application or a broken file. Before you finalize your submission, use this compressed image checklist to ensure your files meet all technical requirements without sacrificing quality.

Confirm the file opens correctly on a phone and computer
Never assume a file is perfect just because the download finished. Always open the image on both your mobile device and your computer to ensure there are no corruption issues. If the file fails to render on one device, it may cause errors when uploaded to a government portal or exam website.
Check the final size, dimensions, extension, and color appearance
Verify that your file size is within the allowed limit, especially when using tools like ImageTo20KB for strict requirements. Check that the dimensions match the portal’s guidelines and that the file extension (such as .jpg or .png) is correct. Ensure the colors look natural and have not been distorted during the compression process.
Zoom in on faces, signatures, text, and fine edges for visible artifacts
When using tools like TinyPNG, Squoosh, or Compressor.io, it is easy to over-compress an image. Zoom in to 200% to inspect faces, signatures, and small text for blurriness or pixelation. If the details look fuzzy, you may need to adjust your settings to prioritize quality over a smaller file size.
Make sure the file name uses only accepted characters when an application requires it
Many official Indian government portals have strict rules regarding file names. Avoid using spaces, special characters, or long strings of text. A simple, descriptive name like “Candidate_Signature.jpg” is usually the safest choice for any upload.
Keep the original and compressed copies clearly labeled
Always maintain a folder with your original, high-resolution files. Label your compressed versions clearly, such as “Photo_Final_20KB”, so you can easily distinguish them from the source. This practice allows you to quickly revert to the original if an application rejects your compressed file for any reason.
| Tool Name | Best Use Case | Verification Focus |
|---|---|---|
| ImageTo20KB | Exam Forms | Strict 20KB limit |
| TinyPNG | General Web | Color accuracy |
| Squoosh | Custom Privacy | Visual sharpness |
| Cloudinary | Automation | Delivery format |
| ImageOptim | Mac Batching | Metadata removal |
Conclusion
Selecting the best image compressor 2026 depends entirely on your specific goals. You now have a clear roadmap to handle everything from casual web sharing to strict government application requirements.
For those navigating Indian exam portals, ImageTo20KB stands out as the premier choice. It provides the precision needed for passport photos and signatures when you face a strict 20KB limit. Other tools serve different needs effectively. TinyPNG remains a top pick for general web tasks, while Squoosh offers excellent privacy for sensitive files. Cloudinary supports complex development workflows, ImageOptim handles batch tasks on Mac, and Compressor.io provides a versatile online experience.
Finding the best image compressor 2026 is about matching the right tool to your unique workflow. Always prioritize the official guidelines provided by your university or government board regarding dimensions and file formats. Keep your original files safe before you start the optimization process.
Take a moment to inspect your final output for clarity and sharpness. Verifying your file before submission ensures your application moves forward without technical delays. Use these reliable tools to manage your digital assets with confidence and ease.
FAQ
Which tool is best for reaching a strict 20KB limit for Indian exam forms?
A: ImageTo20KB is the most specialized tool for this task. While general-purpose optimizers like TinyPNG or Compressor.io are great for reducing file sizes significantly, they don’t always let you hit an exact target. ImageTo20KB allows you to resize image to 20KB or compress image to 20KB specifically to meet the requirements of government portals, passport photos, and signatures.
What is the difference between lossy and lossless compression?
A: Lossy compression (used by tools like TinyPNG and Compressor.io) removes some data from the image to greatly reduce the file size, which is usually fine for web use. Lossless compression (offered by ImageOptim) reduces the file size by removing unnecessary metadata without touching the pixel data, keeping the quality identical to the original. For Indian government applications, lossy compression is often necessary to stay under strict kilobyte limits.
Can I compress images without creating an account?
Yes! Most of the top tools in 2026, such as Squoosh, TinyPNG, ImageOptim, and ImageTo20KB, are no-signup tools. You can simply upload your file and download the result immediately. Cloudinary is the main exception in this list, as it is a more robust platform intended for developers and usually requires an account to manage media libraries.
Should I use JPEG, PNG, or WebP for my upload?
It depends on your needs. JPEG is best for passport-style photos because it handles color gradients well. PNG is ideal for handwritten signatures or logos where you need sharp edges and transparency. WebP and AVIF are modern formats that offer even better compression, but you should check if your specific application form supports them before uploading.
How can I ensure my signature remains readable after compression?
To keep a signature clear, try to resize the dimensions to the required width and height first rather than just cranking up the compression. Using Squoosh or ImageTo20KB allows you to preview the results so you can ensure the thin strokes of the pen don’t disappear or become too blurry to verify.
Is it safe to upload my private documents to these online tools?
Privacy is a priority for many users. Tools like Squoosh and ImageOptim are excellent because they process images locally on your device rather than uploading them to a remote server. If you are handling highly sensitive official documents, these “local-first” options provide an extra layer of security compared to traditional cloud-based compressors.
Why did my file size not change much after using a compressor?
This often happens if the image is already highly optimized or if you are using lossless compression on a file that has no extra metadata to remove. If you need a significant drop in size to reach a 20KB limit, you should use ImageTo20KB to force a specific target or use Squoosh to manually lower the quality and dimensions.
What are the most common mistakes to avoid when compressing images?
The biggest mistake is deleting your original photo before you are sure the compressed version is accepted by the portal. Other common errors include repeatedly compressing the same file (which ruins quality), ignoring the required dimensions, and simply changing the file extension (like renaming .png to .jpg) instead of using a real conversion tool.
Does ImageOptim work on Windows or mobile devices?
No, ImageOptim is a dedicated macOS desktop application. If you are on Windows, Android, or iOS, you are better off using browser-based tools like Squoosh, TinyPNG, or ImageTo20KB, which work perfectly across all platforms without needing an installation.
How do I verify my image before submitting it to a government portal?
Before you click submit, check the final file size on your computer to ensure it is under 20KB (or your specific limit). Open the image and zoom in on the face and text to ensure there are no “artifacts” or blurriness. Finally, make sure the file name follows the portal’s rules, as some sites don’t allow spaces or special characters in the title.